Halloween is almost upon us, and while you might have already picked out the perfect costume, have you thought about how to decorate your pumpkin? If you’re a basketball fan, we’ve got the perfect idea for you – a basketball pumpkin carving! This slam dunk Halloween idea is a unique way to show off your love for the sport while getting creative with your pumpkin carving skills. Imagine a perfectly round pumpkin transformed into a miniature basketball, complete with carved-in lines and textures that mimic the surface of a real basketball. It’s not only a fun and eye-catching decoration, but it’s also a great conversation starter at your Halloween party.
Plus, basketball pumpkins are easy to make with just a few simple tools and some basic carving techniques. Whether you’re a seasoned pumpkin carving pro or a beginner, this project is sure to be a hit. So why not take your Halloween decor to the next level with a basketball pumpkin this year? It’s a slam dunk!
Materials Needed
To create a basketball pumpkin carving, there are a few materials that you will need. First, you will need a pumpkin that is round enough to carve and has a smooth surface for drawing and carving. Next, you will need a set of carving tools, including knives, drills, and engraving tools.
These tools will allow you to create the intricate details and patterns required to make the basketball design stand out. You will also need a permanent marker to outline the design on the pumpkin and a set of stencils that you can use to create the basketball lines and other details. Finally, you will need a candle or another lighting tool to illuminate the pumpkin once it is finished.
By using these materials and your creativity, you can make a unique and eye-catching basketball pumpkin carving that will be the envy of all your friends. So grab your tools and let’s get carving!
Pumpkin
If you’re looking to create a festive fall centerpiece or decorate your porch for Halloween, a pumpkin is a classic choice. To get started, you’ll need a few materials. First and foremost, you’ll need a pumpkin! You can choose any size or shape that you like, depending on your preference and the space you’re working with.
You may also want to gather decorating supplies such as paint or markers, stickers, glitter, or carving tools if you plan to carve a design into your pumpkin. For carving, it’s a good idea to have newspaper or a tarp to protect your work surface, and a sharp knife or pumpkin carving kit. If you prefer to skip the mess of carving, you could also opt for painting or drawing on your pumpkin instead.
Whatever materials you choose, have fun and let your creativity shine!
Basketball stencil
If you’re a basketball fanatic and love to show off your skills on your driveway at home, then you’re going to need a basketball stencil. This will help you to mark out the court lines and ensure that you have a professional-looking setup. To create your stencil, you will need a few materials.
These include some thin cardboard or plastic, an X-acto knife, a ruler, a pencil, and some paint and a roller. The first step is to draw out your stencil design onto the cardboard or plastic using your pencil and ruler. Make sure that you measure everything correctly and that your lines are straight.
Once you have your design, use the X-acto knife to carefully cut out the stencil. You can then use this to spray paint the court markings onto your driveway. With these simple, affordable materials, you can create a top-quality basketball stencil and take your game to the next level!
Carving tools
Carving tools are an essential item for any woodcarver, but it’s important to have the right materials in order to achieve the best results. Firstly, you’ll need a carving knife, which is the most basic and versatile tool. Another important item is the gouge, which is used for hollowing out wood and creating rounded shapes.
A chisel is also important, as it, too, can be used for shaping and for creating straight lines and flat surfaces. Additionally, a V-tool can be used to create fine details and outlining. Finally, a sharpening stone is necessary to keep your tools sharp and in good working order.
With these materials in hand, you’ll be well-equipped to tackle any carving project that comes your way, and achieve some truly impressive results.
Step-by-Step Guide
If you’re looking for a fun and unique way to show your love for basketball during the fall season, why not try basketball pumpkin carving? It’s a great activity for all ages and can be done in just a few easy steps. First, choose a basketball design that you like or draw your own on the pumpkin with a marker. Then, carefully carve out the lines of the design using a sharp knife or pumpkin carving tool.
Be sure to take your time and work slowly to avoid any mishaps. Once you’ve finished carving, insert a candle or battery-operated light into the pumpkin to make the design really pop. And there you have it, a perfect way to show off your basketball fandom during Halloween and beyond!
Selecting the pumpkin
When selecting the perfect pumpkin, there are a few things to keep in mind to ensure that you choose the right one for your needs. Firstly, consider why you’re buying a pumpkin in the first place and what you want to do with it. If you’re looking to carve a spooky design for Halloween, then you’ll want to opt for a larger pumpkin with a flat bottom to make the process easier.
On the other hand, if you’re planning on using it for cooking or baking, then choose a smaller pumpkin with a stem that’s still firmly attached. Additionally, check for any bruises, soft spots, or blemishes on the pumpkin’s surface and give it a gentle tap to ensure that it’s not hollow or empty inside. By following these simple steps, you’ll be sure to select the perfect pumpkin for your needs.
Happy pumpkin hunting!
Preparing the pumpkin for carving
When it comes to preparing a pumpkin for carving, the process may seem overwhelming at first. But with this step-by-step guide, you’ll be ready to create a spooktacular design in no time! First, start by selecting a pumpkin that is firm and has a flat base to prevent it from rolling. Cut off the top of the pumpkin with a sharp knife and remove the seeds and pulp with a spoon or scraper.
Save the seeds for roasting later if desired! Next, use a marker or pencil to draw your design on the pumpkin, or use a pumpkin carving stencil for more intricate designs. Once your design is complete, carefully carve along the lines with a serrated knife, taking care to cut away from yourself. Remember to keep your fingers and other body parts away from the knife! Finally, clean out any remaining pulp and place a candle or light inside the pumpkin.
Voila! You’re now ready to display your beautifully carved pumpkin for all to see. Don’t forget to share your creation with your friends and family as an inspiration for their own pumpkin carving adventures.
Transferring the basketball stencil
When it comes to transferring a basketball stencil onto a surface, there are a few steps you need to follow to get it just right. First, make sure your stencil is clean and free of any debris or dust. Then, position your stencil on the surface and secure it in place with tape or adhesive.
Next, using a brush or sponge, apply your paint evenly onto the stencil, making sure not to apply too much or too little. Once you’ve covered the entire stencil, carefully remove it from the surface and allow the paint to dry completely. Finally, clean your stencil and reuse it as needed.
With these simple steps, you can easily transfer your basketball stencil onto any surface and create the perfect design. So, gather your supplies and get ready to score big with your next DIY project.
Carving the pumpkin
Carving a pumpkin is an exciting Halloween tradition that many people love to do. But for some, the thought of making precise cuts and scooping out pumpkin guts can be intimidating. Fear not! With this step-by-step guide, you’ll be carving your pumpkin like a pro in no time.
First, gather all of your materials: a sharp knife, spoon, marker, and, of course, a pumpkin. Next, cut off the top of the pumpkin and scoop out the seeds and pulp with a spoon. Then, using your marker, draw your design on the outside of the pumpkin.
Remember, the larger the design, the easier it will be to carve. Using your knife, carefully cut along the lines of your design. Take your time and make small, precise cuts.
Don’t be afraid to go back and fix any mistakes. Finally, place a candle or LED light inside your pumpkin, and voila! You’ve officially carved your own pumpkin. As a bonus tip, consider using a pumpkin carving kit or stencils to make the process even easier.
Happy carving!
Final Touches
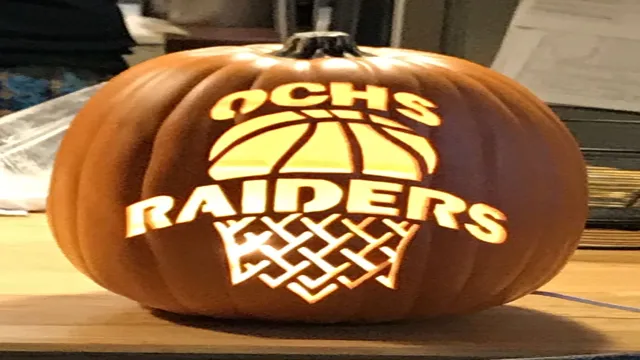
Now that you’ve picked out your pumpkin, put your carving skills to the test with a basketball pumpkin carving! The final touches are what really make your pumpkin stand out, so take your time with the details. Use a small carving tool to carefully etch out the lines of the basketball texture, making sure to follow the curves and bumps of the pumpkin. If you’re feeling daring, you can even carve out a mini basketball to place inside the pumpkin for an added touch.
Don’t forget to light up your masterpiece with a candle or LED light for the full effect. With a little patience and creativity, your basketball pumpkin carving will be the star of your Halloween decor.
Adding basketball details
As we near the completion of our basketball court project, it’s time to add the final touches that will really bring it to life. To make our court feel authentic, we need to include some basketball-specific details. We can start by adding court lines, using tape or paint to mark the free throw line, three-point line, and half-court line.
We can also add a backboard and hoop, either purchasing one or building our own from scratch. For those who want to take their court to the next level, we can add netting or a fence to keep the ball contained. And don’t forget to add a scoreboard to keep track of points and time, even if it’s just a simple whiteboard with markers.
By incorporating these details, we can create a court that not only looks great but feels like a true basketball court, inspiring us to play our best game.
Lighting your basketball pumpkin
Now that you’ve carved out your basketball pumpkin and created the perfect design, it’s time for the final touch: lighting it up. This step is crucial to making your pumpkin stand out and really pop. One option is to use a flashlight or LED light to illuminate your pumpkin from within.
Simply place the light inside the pumpkin and adjust as needed until your design is fully illuminated. For a more dramatic effect, consider using a flickering candle or battery-operated tea light. These lighting options will create a spooky, yet enchanting atmosphere for your basketball pumpkin.
Be sure to test the lighting before showing off your creation to make sure it looks just right. With a little extra effort, your basketball pumpkin is sure to impress all your friends and family this Halloween.
Showcasing Your Creation
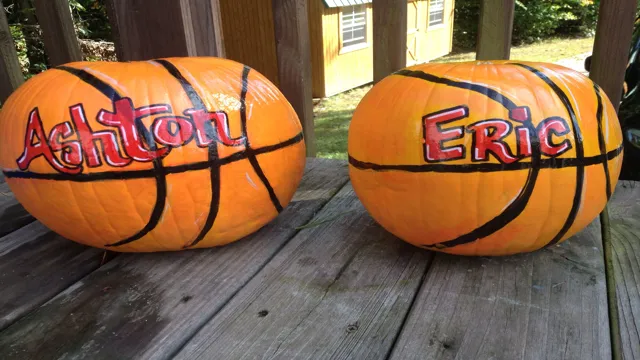
Are you looking for a unique way to showcase your love for basketball during the Halloween season? Why not try your hand at a basketball pumpkin carving! This fun and creative project involves carving a jack-o-lantern to resemble a basketball, complete with the iconic black lines and shade variations. With a few simple tools and a bit of patience, you can create a piece of art that will impress all your basketball-loving friends. Start by selecting a large, round pumpkin with minimal bumps or ridges, then sketch out your design with a marker or pencil.
Use a serrated knife and a pumpkin scoop to carefully carve out your design, taking care not to cut too deeply or too quickly. Once you’re finished, place a small battery-operated candle inside to light up your creation and show it off to the world. Whether you’re a seasoned pumpkin carver or a first-timer, this basketball pumpkin carving is sure to be a slam dunk!
Displaying your basketball pumpkin
After putting in all the effort to create your ultimate basketball pumpkin, it’s now time to show it off to the world! One great way to showcase your creation is by placing it in a prominent location. Whether it be your front porch or in the center of your Halloween decorations, make sure it’s easily visible to passersby. To add an extra touch, consider placing a light inside the pumpkin to illuminate it at night.
Taking a picture of your pumpkin and sharing it on social media is also a fun way to display your creation. You can use hashtags such as #basketballpumpkin or #pumpkincarving to get more exposure and potentially inspire others to create their own basketball-themed pumpkins. Overall, don’t be afraid to flaunt your creativity and display your amazing basketball pumpkin for all to see!
Sharing your basketball pumpkin on social media
Once you’ve finished carving your amazing basketball pumpkin, it’s time to share it with the world! Social media is a great way to showcase your creation and gain recognition for your hard work. Start by taking some high-quality photos of your pumpkin, making sure to highlight its unique features and intricate details. Then, choose a platform that works best for you – Instagram, Facebook, Twitter, and TikTok are all great options.
When posting, be sure to use relevant hashtags such as #basketballpumpkin or #pumpkincarving to increase the visibility of your post. Additionally, don’t forget to engage with your followers by asking for feedback and encouraging them to share their own pumpkin creations. By sharing your basketball pumpkin on social media, you not only get to show off your skills but also inspire others to get creative and have fun this Halloween season.
Conclusion
Well folks, we’ve seen some impressive feats of creativity and craftsmanship in the basketball pumpkin carving world tonight. From Kobe Bryant portraits to full-on basketball hoops, it’s clear that pumpkin carving isn’t just for Halloween anymore. But let’s be real, the real MVPs are those who can carve a basketball into their pumpkin without losing a finger.
Whether you’re a hoops enthusiast or just appreciate a good pumpkin pun, basketball pumpkin carving is a slam dunk. So next time you’re brainstorming your pumpkin carving game plan, remember to channel your inner LeBron and go for the gold (or orange, rather). Happy carving!”
FAQs
What are some tips for creating a basketball pumpkin carving?
Some tips for creating a basketball pumpkin carving include selecting a round pumpkin, using a stencil or free-hand drawing the basketball lines, and carefully carving the lines with a small knife.
What tools do I need to create a basketball pumpkin carving?
To create a basketball pumpkin carving, you will need a round pumpkin, a carving knife, a scoop, a pencil or marker, and a stencil if you choose to use one.
How long will a basketball pumpkin carving last?
A pumpkin carving typically lasts 5-10 days before it begins to rot. However, you can extend the life of your basketball pumpkin carving by keeping it in a cool, dry place and spraying it with a mixture of water and bleach every few days.
Can I eat the pumpkin after carving a basketball design?
Yes, you can still eat the pumpkin after carving a basketball design, but it may not taste as good as an uncarved pumpkin. To prepare the pumpkin, wash it thoroughly, cut it in half, remove the seeds and pulp, and then bake it in the oven at 350 degrees Fahrenheit for 45-60 minutes.